The Ultimate booties Size Guide: Prevent arthritis While Keeping the Look Clean
Meta description: The Ultimate booties size guide to protect paws, reduce joint strain, and keep your dog looking neat.
Quick Summary
- Proper booties protect paw pads from harsh surfaces, curb slips, and can ease load on joints.
- Accurate sizing is key—measure both paws and use the size chart.
- A gentle, reward-based acclimation makes wearing booties a positive routine.
- Clean and inspect booties regularly; replace worn ones to maintain comfort and support.
- Use booties as part of a broader arthritis-friendly routine: warm-ups, appropriate exercise, and vet guidance.
Why This Matters for Your Dog
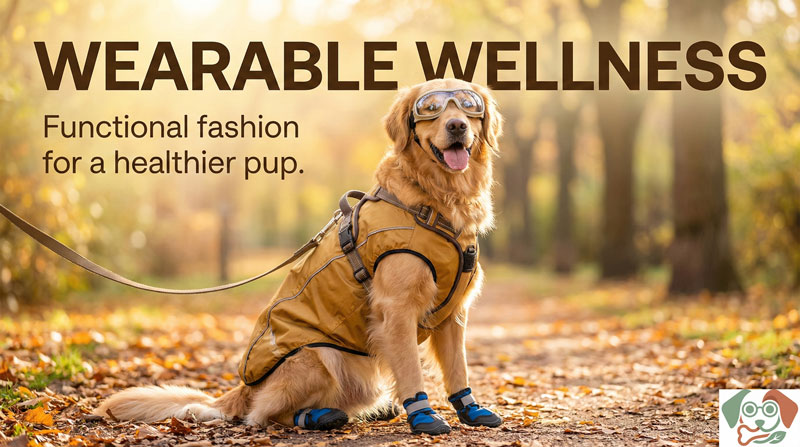
Paw health matters for everyday comfort and mobility. For many dogs, rough sidewalks, hot pavement, icy paths, or slick floors can irritate pads and alter gait. That extra strain can ripple up the chain to the hips and back, especially in Dogs at risk for arthritis. Wearing well-fitting booties helps protect paw pads, provides traction on slick floors, and can keep joints from overcompensating during walks and play. Boots aren’t a cure for arthritis, but when combined with proper care, training, and regular vet checks, they’re a practical tool to support mobility and a cleaner, healthier look for your pup.
Key Factors (Common Causes of Discomfort and How Boots Help)
- Surface heat or cold: Hot concrete and icy patches can irritate paws. Boots create a barrier and add traction.
- Slips on slick floors: Tile and hardwood can lead to sudden slips, stressing the joints.
- Rough terrain: Gravel, sand, or salted sidewalks can irritate pads. Boots cushion and protect.
- Weight and gait: Extra load from uneven footing can aggravate arthritis symptoms. Boots help stabilize footing for some dogs.
- Hygiene and grooming: Dirty paws track dirt indoors and can worsen Sensitive Skin. Boots keep paws cleaner between baths.
Note: Boots are a supplement to care, not a medical treatment. If you notice limping, swelling, or persistent pain, consult your veterinarian. This guide offers practical steps and safe, humane methods.
Step-by-Step What To Do
1) Gather supplies and set up a calm space
– Pick a quiet room with soft flooring (carpeted area or rug). Have treats handy, a favorite toy, and a leash.
– Choose a pair of dog booties with flexible fabric and non-slip soles. Look for breathable materials and adjustable closures.
2) Measure accurately
– Have your dog stand naturally. Gently measure paw width (the widest part of the paw) and paw length (the distance from heel to the tip of the longest toe). Do this on all four paws.
– Compare measurements to the brand’s size chart. If a paw is between sizes, opt for the larger size and verify fit once on the paw.
3) Pick the right size and fit test
– Put one boot on first. Make sure there’s about a 1/4 inch of space at the toe and no pinching at the ankle.
– Check for even pressure across the paw. The boot should not slip excessively when the dog walks in place.
– Repeat for the other three paws. If any boot is noticeably loose, consider a smaller size or a boot with a snugger strap.
4) Introduce booties slowly (indoor acclimation)
– Start with 1–2 short sessions (2–5 minutes each) on carpet. Use high-value treats to reward every step with the boot.
– Keep sessions fun and short; if your dog shows stress, end on a positive note and try again later.
– Gradually increase session length and move to safer, non-slip flooring like a rug or mat.
5) Break-in plan that works for apartments and suburbs
– Apartment living: practice in hallways, then inside the apartment, followed by a short outdoor balcony or yard time.
– Suburban homes: begin in the garage or foyer, then progress to the driveway, sidewalk, and a small yard loop.
– Always pair boot-wearing with a positive routine: a quick indoor walk, toss a ball, or a training task.
6) Reinforce with a daily routine
– Build a routine: 5–10 minutes of boot-wearing after morning meals, followed by a gentle walk or sniff session.
– Use rewards: treats, praise, and a favorite toy to mark calm behavior wearing boots.
– Monitor comfort: check paws after each use for redness, hot spots, or rubbing at the leg. If you notice irritation, remove the boot and reassess fit.
7) Cleaning, care, and conditioning
– Clean boots after outdoor use with mild soap and water; air dry away from direct heat.
– Inspect soles for wear; replace boots when tread is thin or fabric shows wear that could cause discomfort.
– Store boots in a dry, accessible spot so you’ll remember to check fit regularly.
8) Integrate with other arthritis-friendly practices
– Gentle, low-impact exercise like short leash walks, slower pacing, and consistent schedules help joints.
– Maintain a healthy weight to reduce joint stress.
– Schedule regular vet check-ins for mobility assessments and gait.
9) When boots fit well, it’s time to expand use
– Use boots for vet visits, hikes, dog park trips, and rough-weather days.
– For rainy or snowy days, choose waterproof, insulated options with secure closures to keep feet dry and warm.
Mistakes to Avoid
- Buying boots that are too tight or too loose. Tight boots can cut circulation; loose boots create trip hazards.
- Forcing a dog to wear boots for long periods before they’re ready. Build up gradually.
- Choosing boots with irritating seams or rough inner linings. Look for smooth interiors.
- Not checking nails, fur, or skin beneath the boot. Irritation can occur if fur is caught or if pressure points form.
- Assuming all dogs need the same boot style. Breeds with different paw shapes may require different designs (e.g., wider paws vs. longer toes).
- Skipping cleaning and drying. Moisture can cause chafing or skin irritation.
- Using booties as a sole substitute for regular veterinary care when arthritis symptoms are suspected. Boots help, but a vet visit is essential.
When to Call a Vet or Certified Professional
- Persistent limping, swelling, or weight-shifting away from a leg.
- Signs of pain that don’t ease with a boot acclimation or rest period.
- Skin irritation, redness, blisters, or hair loss under the boot.
- Any new gait changes or reluctance to move after boot-wearing begins.
- If you’re unsure about arthritis risk or management for your dog’s breed, age, or health status.
Vet disclaimer: This guide is for education and practical care. It does not replace veterinary diagnosis or treatment. If you have concerns about arthritis or joint health, contact your veterinarian for guidance tailored to your dog.
FAQs
- Do booties prevent arthritis? They don’t cure arthritis, but they can reduce paw trauma, provide traction on slippery surfaces, and support comfortable movement, which is helpful as part of a broader arthritis management plan prescribed by your vet.
- How do I know my dog’s boot fits? Look for a snug but not tight fit, no sliding when walking, and toes not pinched. If the boot shifts or rubs, adjust size or strap position.
- Can I use any boot for outdoor use? Choose boots designed for dogs with non-slip soles, breathable fabrics, and secure closures. Some are water-resistant or waterproof for winter or rainy days.
- Do I need to Trim nails before booting up? Short nails reduce boot resistance and slip risk. If you’re unsure about nail length, ask your vet or a groomer for guidance.
- How long should a boot acclimation take? Start with 2–5 minute sessions and gradually add time across 1–2 weeks, depending on your dog’s comfort. End on a positive note.
If you’re new to dog booties, take it slow and celebrate small wins. Your dog’s comfort and safety come first. With thoughtful sizing, careful acclimation, and a routine that fits your home—whether you’re in a cozy apartment or a sunny suburban yard—you’ll keep paws healthy, protect joints, and help your dog look tidy and cared-for on every outing.