Upcycled dog leash DIY: Softer fabrics for Bad Breath and a zero-waste closet
Quick Summary
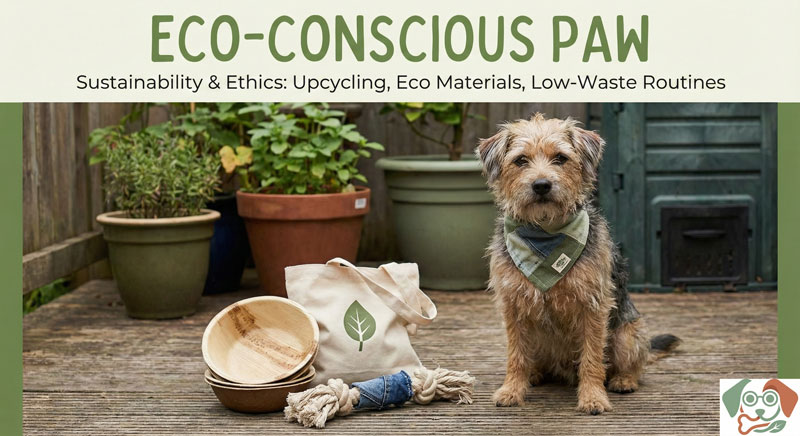
Create a gentle, durable dog leash from upcycled fabrics. Use soft textiles you already have, keep hardware safe and sturdy, and treat waste like treasure. The result is a cozy grip for you, a safer leash for your dog, and less trash in your home.
Why This Matters for Your Dog
- Comfort during walks means better cooperation, especially for puppies or seniors.
- Softer fabrics reduce friction on the hands and around the dog’s neck.
- Zero-waste habits cut clutter and save money.
- A DIY leash can be integrated into crate training, park visits, and vet trips with a calm routine.
Key Factors
- Fabric: Choose soft, washable fabrics (fleece, cotton blends, old sheets) that hold up to washing.
- Durability: Reinforce stress points (where hand and leash meet, and where hardware attaches).
- Hardware: Use sturdy bolts snaps, rivets, or rings that won’t rust.
- Fit and length: Standard leashes are about 4–6 feet; adjust based on dog size and local parks.
- Cleanability: Pick fabrics that tolerate frequent washing to keep smells, including after dental treats, from lingering.
Step-by-Step What To Do
1) Gather materials
– Soft upcycled fabric scraps (fleece, cotton, denim trim)
– Durable webbing or a sturdy fabric strip for the core
– Hardware: one bolt snap, one D-ring, thread suitable for heavy seams
– Scissors, measuring tape, needle or sewing machine, pins
– Optional: fabric glue, seam roller, chalk for marking
2) Pick your fabric
– Choose fabric you can wash easily. Avoid loose fibers that shed.
– Aim for a width around 1 inch to 1.25 inches for a comfortable grip.
3) Cut your leash
– Mark a piece about 4–6 feet long and 1 inch wide. If you’re new to sewing, start with 4 feet.
– Cut a matching small strip for reinforce at the handle.
4) Prep the handle and core
– If you’re using a loose fabric, sandwich the fabric between webbing or fold it to create a stronger core.
– Sew a double stitch along the edges of the handle to prevent wear.
5) Attach hardware
– Loop the end through the bolt snap and secure with a few tight stitches or a small box stitch.
– Add a D-ring near the handle for waste bags or a small accessory if you like.
– Reinforce the connection with extra stitches and a small square of fabric at stress points.
6) Finish and test
– Trim loose threads. Press gently.
– Test the leash by pulling evenly with moderate force. Look for any weak spots.
– Wash the leash before your first walk to remove any manufacturing dust and to start a clean routine.
7) Care and maintenance
– Wash weekly or after muddy or sweaty walks.
– Inspect for frays. If you see more than a nick, replace the leash.
– Store in a dry spot to prevent mold.
8) Zero-waste integration
– Use fabric scraps to make a matching collar sleeve, a small toy, or a travel wipe cloth.
– Donate or swap any fabric that isn’t suited for the leash project.
9) Everyday use ideas
– Apartment life: a 4-foot leash is easy to manage in small spaces; keep it attached to a crate or wall hook.
– Suburban hikes: choose a longer leash if you walk along trails; test in blocks before longer routes.
Mistakes to Avoid
- Skipping reinforcement at stress points.
- Choosing frayed or delicate fabrics that won’t hold up to chewing or tugging.
- Skipping a test pull and assuming it’s strong enough.
- Using hardware that’s too light for your dog’s size.
- Not washing or inspecting regularly, which hides weak spots.
When to Call a Vet or Certified Professional
- If your dog shows pain, coughing, or trouble breathing after a walk, stop using the leash and consult your vet.
- If you notice skin irritation around the neck from the leash, seek professional advice.
- For any questions about dental health or breath, refer to your veterinarian; this DIY guide focuses on safety and care, not medical treatment.
Vet disclaimer: This post provides general care tips and a DIY project. It does not replace veterinary advice or medication dosages. If you have health concerns about your dog, please contact a licensed veterinarian.
FAQs
- Can I reuse old towels or t‑shirts? Yes. Choose fabrics that hold seams and wash well.
- Is a DIY leash safe for big dogs? Start with a longer, wider strap and reinforce all stress points. If your dog yanks or chews aggressively, consider a professionally rated leash.
- How do I clean it? Hand wash or machine wash on gentle with mild detergent; air dry.
- What if my dog chews the leash? Replace promptly. Regular checks help prevent accidents.
- Can I make this no-sew? A basic no-sew option exists using fabric glue and folded edges, but sewing is more durable for long-term use.
- How long does it take? A beginner project can take 1–2 hours, plus time for washing and testing.
This upcycled leash project is a practical, beginner-friendly way to bring eco-friendly habits into daily dog care. It lowers waste, adds a soft grip for safer handling, and supports routines—from crate training to park visits—while keeping your walk calm and enjoyable.